How To Programme Sending An Email Later In A Specific Time You Choose

Have you ever been in need to send an email later in a specific time ? If yes, you really need a tool that helps you schedule your emails and help you to sent them at a later date you specify.

Rightinbox is a small tool that supports Google Chrome browser as well as Firefox. It enables you send your emails later in a specific time you decide. In this post, you will learn more about this tool.


First of all go to chrome store and install the right inbox to your chrome browser ar just go to rightinbox site ind click on install now button.


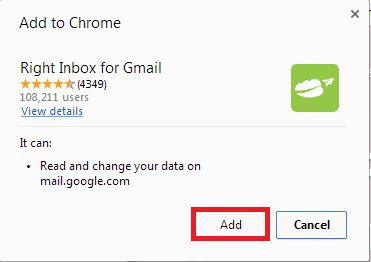
After adding the extension, you will get the notification telling you that the Right Inbox for Gmail has been added to your browser.


Go to your Gmail account you will got a notification saying that you are almost finish the service. Just continue.

After that, you should grant access to the right inbox application to access your gmail by clicking accept.


finnaly, you just try to compose an email and you will see new buttons with schedule of sending emails.

Don't hesitate to share you experience with it !

Read Your Messages On Gmail Without Connecting To The Internet


With Gmail offline, messaging becomes even more simple and effective. Gmail Offline is a simplified version of Gmail that you can access without being connected to the Internet. Emails that you create offline are sent as soon as an Internet connection is available. Messages and conversations that you delete, archive or change are also synchronized when you connect.


This chrome extension comes with some interesting features:

• Access to Gmail without an Internet connection.
• Automatic synchronization of transactions offline when Internet connection is reconnected.
• Simplified user interface for searching and fast processing of messages.

For more features, description and install: Gmail Offline

How To Know If Your Gmail Account Is Opened From Somewhere Else

Google gives to Gmail users an interesting feature that a lot of them ignore which is knowing the location from where they are connected and opened Gmail.


All what you have to do is open your Gmail account and then go to the bottom of the list of messages, then click on Details.


A new window will be opened containing a range of informations about your account activity in the various devices.


In this window you will see:

  • "Access Type" column show the type of access, whether on the web browser or mobile phone...
  • "Location" is the location (ip address) of your connection.
  • "Date Times" box is the time that you are logged in and the duration of your session.

And therefore, if you notice any activity that has nothing to do with you, you must change your password!

How To Delegate Your Gmail Account To Someone Else Without Giving Him Password

Sometimes, you may need to allow someone to enter to your Gmail account in order to respond to some of your messages or allow him to manage one of your Google services when you are busy, away or absent.

But at the same time you may not want to share your account's password in order to ensure the protection and don't deal with it. For this purpose, Google provides you an added feature that give or delegate Google services as well as management of your Gmail account to an other person but without hacking account by changing your password.

Go to your Gmail account and click on Settings:


1- Go to the tab: "Accounts and Import".
2- Click "Add an other account".
3- Enter the address to whom you delegate access.
4- Click to send email and grant access.

A verification email to accept or deny delegation will be sent.
It may take up to 30 minutes for the verification to complete. Then you can view and send messages on behalf of delegated address.

You may switch to the delegated account by just clicking on it.


How To Create a Shortcut For Your Gmail in Desktop or Quick Launch bar


Most of the time, all of us want to quickly enter to Gmail and minimize the number of steps to do so. Today I show you a handy trick to access in with a single click! : a desktop or task bar icon for direct access to your Gmail account.

A- As Desktop Icon:


1- Drag the link to the desktop: First of all, go and connect to your Gmail Inbox, select the link as shown and drag it to your desktop. look ugly ? don't worry :)

2- Change icon: Right click in the shortcut and select Properties. In the Web Document tab, simplify the present address in the URL field. Keep only the address "https://mail.google.com/mail/u/0/#inbox". After that click on change icon and choose the appropriate icon you like. Confirm by clicking OK.

3- Change title: Right click in the shortcut and select Properties. On the General tab, just give Gmail shortcut name. Confirm by clicking OK.
You are done !


B- As Quick Launch bar Icon:


1- Windows XP: place the button on the Quick Launch bar (bottom left, right side of the Start menu). To do this, right-click on the newly created shortcut, and then drag and drop it in the Quick Launch bar. Release the mouse button and select Copy Here from the menu that appears.

2- Windows 7: Add a shortcut in the taskbar. To do this, drag the shortcut to the taskbar. Windows then offers action pin to Firefox, Chrome, Internet Explorer (or any other browser depending on your configuration). Drop the icon. Now when you right-click the icon of your browser in the taskbar, you go directly to the shortcut (placed in the pinned section).